Showing posts with label silk ribbon embroidery. Show all posts

Tuesday, September 1, 2015

Mary Jo Hiney Silk Ribbon Craftsy Class Giveaway

***Update, September 10***
Our winner was Maria, and I have emailed her.

Thank you all for your interest in Craftsy!
I would like to extend the offer of $20 off my class on Crazy Quilting to you.  Click this link.

Happy Stitching, Everyone!


Craftsy is giving me the opportunity to give away the Silk Ribbon Class by silk ribbon artist Mary Jo Hiney!

Isn't that luscious ribbonwork?


Mary Jo’s Mom began teaching her to sew and hand-embroider at age three and she’s been doing both ever since, eventually leading to a fascination with ribbon.  Her easy-to-follow class introduces you to the basics by exploring simple stitches, their variations and the subtle nuances of this particular type of embroidery.  Mary Jo’s students appreciate the clear and concise lessons in ribbon embroidery that lead to a great pay out.  That includes me!

In addition to teaching, Mary Jo is the owner of Mary Jo Hiney Designs, producing a thorough line of hand-dyed silk ribbons and fabrics for the textile artist, as well as a designer for Vogue Patterns. 

Here is the giveaway link:

http://www.craftsy.com/ext/Allie_Giveaway 

Just click it and you are entered!
Craftsy will be choosing the winner on September 9th at midnight and will let me know right away.


Mary Jo makes this form of embroidery doable and satisfying.  You will love her class!

Tuesday, March 6, 2012

Herringbone Hearts...Anatomy of a Border

There was this experiment I just had to try.
I've been wanting to see just how far I could push the use of a single stitch in a crazy quilt, to put a greater focus on the threads and use of the supplies in general within the context, of well..... herringbone, without the distraction of the visuals caused by lots of combination stitches.
And this push of my personal CQ envelope involved some 38 mm silk ribbon. And pliers!

I started by laying out the "base" fabrics for the border, green silk that had been interfaced and then the edges sewn because it is very ravel-y and was going to be subject to some heavy stitching abuse.

I measured the distance across the quilt every 12" or so to make sure my strips were parallel as I pinned them on.  I knew that I had to applique them as I would never be accurate enough otherwise.  No turned under seam was necessary though, as it would be covered by trim later.

May the quality control expert took a break to look out the window while I was sewing on the green silk.
Then came the trim.

I got this green woven metallic trim off of Ebay from a seller of Indian sari silks.  There are lots of great trims to be found on Ebay!  I liked it for this quilt because it has hearts in it, and the metallic would add some shine.
So I pinned it in place...

....with many extra pins where the trim would cover the Evil Velvet.  Otherwise, no matter what, the trim would slip while I was sewing it down.
Ha, you velvet!  I own you.....

Corners are always a big deal in quilting--no avoiding that fact.  So I did my best to miter these neatly.

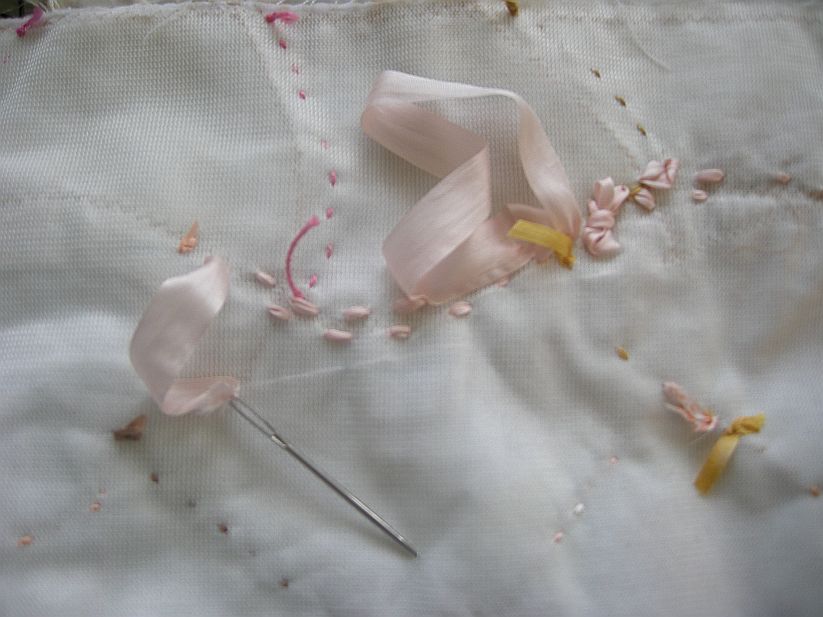
I forgot to photograph running that line of brown herringbone along the upper edge of the trim after it was sewn on.  I was too excited to try my experiment, using really wide silk ribbon in a herringbone stitch.  This is 38 mm from Dharma that I dyed.  It has a woven edge; it's not bias cut.  I needed it that way because it would shred as I pulled it through the silk otherwise.  But this ribbon, in a giant needle and pulled through with pliers for each stitch, held up perfectly fine.
It is really puffy, isn't it?

It was so big and wide that I used my finger as a laying tool as I pulled my stitches into place!

After the 38mm ribbon was on, I went back and wrapped the herringbone stitch above it along the trim.  I was going for more of a raised look and added just a little more color, to blend in with the stitching on the blocks.

This definitely changes the look and feel of the quilt.  It is exceedingly textural now.

In this picture I have ironed under the base border fabric and pinned it.  I will back the quilt later but this is about how it will look finished (squared up better though.)  I have to be very careful with the iron around that puffy herringbone because one false move and it is flat forever.

I'm going to be away teaching the next two week-ends so it will be a little while before I am back here..but I'll keep in touch by reading your blogs and will be posting to Facebook along the way as I travel to Santa Cruz, California and Olympia, Washington.  See you soon!

Saturday, February 4, 2012

13mm Silk Ribbon Herringbone...A Tutorial

I've heard from quite a few people wanting to know about puffy ribbon herringbone....so here is how I do it!

To surround each heart in the 9 blocks in "Herringbone Hearts", I used 5.5 yards of ribbon to stitch the 40" around each heart.  Let's see.....that is 360 inches stitched!  Right as I was finishing up the last one, I took some photos to show you. 

This shows a stitch being made.  It is important to make sure that ribbon doesn't twist as you pull it through.

I just use my scissors as a laying tool, pulling the ribbon through with my left hand while tugging gently in the opposite direction with the scissors.  The laying tool enables you to keep some "loft" in your stitch. You don't want to pull the ribbon too taught, or it will flatten out.  The 4mm ribbon herringbone you see stitched along the seam lines within the heart was meant to be flat.

Pulling the needle through all those layers of cloth is made much easier using a pair of pliers.  My embroidery students all know I give out pliers in class for them to keep. ;-)

Whoops!  This is what happens if you don't pull your ribbon through all the way to the front and keep stitching: you get a loop and you've wasted precious ribbon!  So always check on the back that you've pulled your ribbon all the way, without making it too tight of course.

This is how I add the next length of ribbon.  I've cut off my needle from the previous length and left a "tag" end of about an inch (you don't need that much though.)  With my next length threaded and locked onto my needle, I pierce through the tag end, into the block (but not all the way through to the front, so this won't show).

I pull the ribbon through, and then pierce the very end of it with my needle.

After I've pulled it through, it looks like this.  Not beautiful, but there is no knot.  All these layers of ribbon lie flat, and don't have enough bulk to matter.  I am ready to keep stitching.

One more point I want to make: be careful that you don't pierce the ribbon accidentally as you stitch.  It definitely messes things up if you do, so give a care and make sure you have just gone through the block fabric, not catching any ribbon.
(By the way, back of the block has some fusible knit interfacing on it.  I always interface my blocks before I stitch on them.)

Coming down the home stretch here!  355 inches done, 5 to go....

And finished!
Ah..... my hands need a rest.
Now to join all the blocks together.  And yes, there will be herringbone over the blocks' seams where they've been sewn together, but not in ribbon, thank goodness.  Stitching with thread will feel like a breeze!


Tuesday, May 10, 2011

"Pretty Crazy" in Riversilks Ribbon

It's been a stitching marathon over the last couple of days!
The challenge for this variation of my "Pretty Crazy" pattern for Brookshier Design Studio was to incorporate all the colors in Riversilks' "Summer" collection and keep the stitching simple enough for newcomers. So I kept to just three stitches: herringbone, detached chain, and French knot.

I ended up not curving the seams too much, because I really do want to keep this simple, an introductory project in both crazy "piecing" and silk ribbon embroidery. By the time a newbie is done with this, those three stitches should be second nature!

Saturday, February 16, 2008

Take It Further, February...Rolled Ribbon Roses

I took this picture at Freda Butler's house last week-end. It is a detail of a lovely vintage embroidered bag she had up on her wall. I thought those roses might look good on my Take It Further block for February, if I could figure out how to make them.

Well, I did NOT figure out how they were done and came up with these instead. I won't give a tutorial because I was literally all thumbs making these! But I do like how they came out.

For this month's challenge I also decided to try out some of Pam Kellogg's waste canvas seam treatments from her new book. Here are some leaves in progress. I like doing this kind of work so much....the counting and grid give a solid structure to work within. Sometimes that is just very satisfying.

Here they are in progress, on 10 count canvas....That is yummy Sasse Lynn thread sent to me from Susan Nixon.

And here they are completed. You might notice they look a little darker in this picture. That is because once they were done and the canvas was pulled off, I thought the leaves were just too light. So I very carefully painted the threads with some Tsukineko ink, which worked great.

Here is another of Pam's designs. This one took awhile, but it was worth it.

This was done on 14 count canvas.

And here is the block as a whole thus far.
As I've been stitching on it, I have been musing that it is not about innocence lost so much...but more about just being young, being 17...remembering that special time in my life before the buds had quite opened.....

Tuesday, February 12, 2008

Silk Ribbon Leaves Tutorial

Well thank you all for your lovely response to my ribbon leaves yesterday! As I was planning to do the other seam with them today, I thought I would show you how they are done.

I don't know why I thought to do the standard Japanese Ribbon Stitch upside down, but I did. Also, instead of piercing the ribbon in the middle, I pierced it on the edge of the ribbon. Check out the photos below to see the whole seam in progress....

I started with a stem stitch out of 4 mm ribbon, being very careful not to pull it too tightly.

This is sure easier to do at home than on an airplane.
I began at the outside of the leaf using 4 mm ribbon, slightly overlapping my stitches towards the center. Keeping the stitches just loose enough, and making sure that curl at the bottom went in the right direction was critical.

Next came the switch to 7mm silk ribbon to complete the leaf.

Again, you have to keep a light touch here when pulling on the ribbon. Also, you have to be careful not to snag any of the completed ribbon leaves around the stitching area...because one false tug and all is lost...the yanked on stitches must be removed and then redone.

Here is the block with the second stem of leaves on it. You'll notice it has rotated 90 degrees to the left from yesterday! I added those teeny flowers at the tip of the first one (and will add them to the second one, too), because this block will have butterflies on it next, and we all know butterflies sip on flowers, not leaves.

One of the reason these leaves look so nice is that they are made with hand-dyed silk ribbon. My friends Barbara Blankenship dyed the ribbon on the left, and Pat Winter the darker green on the right.

Speaking of Pat, I just ordered her book this morning, and am so excited to receive it!

Congratulations, dear Pat, on this accomplishment!

Saturday, January 19, 2008

Cottage Portrait...Rocks!

The embellishment around the cottage portrait itself could not compete with the delicate stitching on the printed photograph. I wanted it to hopefully complement it, and set it off, not divert the eye.
So I got to thinking...something symbolic and of the place....

This is the beach right below where the cottage sits, up on that bank. For some reason, the rocks that wash up on the sand here can be very flat and perfectly round or oval. I often collect them when on walks, and have a goodly stash of them here at home. Momentos.
And they would make a really nice little border around the cottage portrait, too!

No drilling for me. I used four-hole buttons, pre-threaded with super strong Silamead thread, and glued them onto the backs of the rocks with E6000 glue, letting them cure overnight.

Then, one by one I threaded each of the four hanging threads into a needle and brought them through to the back of my fabric.

On the back, I tied off my treads using a triple square knot, and then clipped off the excess.

Combining the rocks with some ribbon would make a pleasing contrast, was the idea...this is River Silk's "Sand Box" collection, which I bought last fall while in Houston. (I am always buying embellishment supplies that remind me of Lake Michigan.)

And here you have it.
It may not be the absolute best most appropriate border for the piece (it is a little heavy), but my cousin will be reminded of all our walks together, and she will know EXACTLY what I am getting at here.
I just need to do a little fly-stitching along the seams there, stretch it over foam core, back it, and mail this off to her!