I was honored and thrilled to be invited to participate in Studio e's Designer RSVP program, whose purpose is to showcase their lovely line of Peppered Cotton Fabrics.
These are yarn dyed "shot cottons", meaning the warp and weft are woven with different colors--giving the color a depth unusual in a cotton solid.
Pepper Cory, the fabric line's designer and well known quilting authority, teacher, and maker, talks about how versatile these cottons are, how good at "playing well with other fabrics" in her recent segment of The Quilt Show.
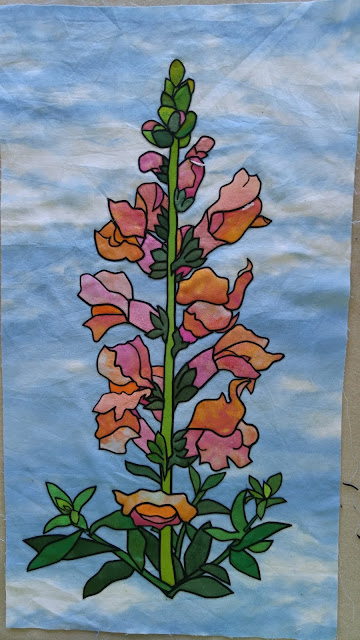
As designers, we were instructed to create a 16" X 16" block using only Peppered Cottons, in a style that was unique to our own personal work. Being interested in stained glass quilts, as you know, I decided to make a stained glass quilt block.
Here it is framed, and ready for Quilt Market, where Pepper will present all the designer blocks.
They are from:
Sue Pelland Designs; http://suepellanddesigns.com/
Janice Pope of Anything But Boring Designs http://anythingbutboring.com/
Valerie Bothell; www.valeriebothell.com
Robin Koehler; http://nestlingsbyrobin.com
Barbara Black; http://bbquiltmaker.blogspot.com/
Kelly Ashton; Kellyquilter.com
Susan Marth; http://www.suznquilts.com/
Kathy Delaney Quilter; http://kathydelaney.com/
Bonnie K Hunter; http://quiltville.com
Gyleen X. Fitzgerald; https://www.colourfulstitches.com/
Pepper Cory; http://www.peppercory.com/
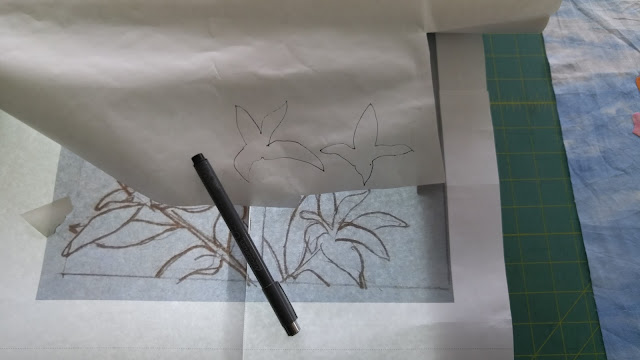
My block was inspired by a vintage quilt in the collection of Julie Silber. I modified and simplified the original applique.
Here is my drawing:
Feel free to use it as you wish!
I love creating patterns from vintage sources and discuss that process step by step in my book, Allie Aller's Stained Glass Quilts Revisited. Check it out, it is a great resource (if I say so myself.) And do stop by Studio e's booth at Quilt Market, #2319.
Tuesday, October 24, 2017
Sunday, September 3, 2017
View My New Episode on The Quilt Sjhow!
Here is the link to my show:
https://thequiltshow.com/watch/show-list/video/latest/show-2105
There is a trailer at that link to give you a peek. Subscribers can see the whole show.
It was a joy to work with such a team of talented and truly joyful professionals. They brilliantly structured my show so that information from my new book on stained glass quilting was presented so clearly. We had two great demo sessions and looked at a lot of quilts. I am really grateful for the opportunity, and the wonderful experience, too.
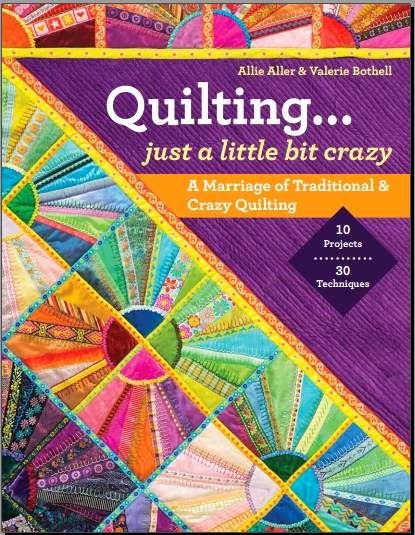
Click on the book's cover over on the sidebar here, below my profile photo, and it will take you to Amazon, where you can order my book, if you are inspired to learn more. But meanwhile, this week enjoy the show for free!
Thank you so much, Alex Anderson and Ricky Tims. You are the best!
Thursday, June 22, 2017
Stained Glass Flower Portraits: A Tutorial
These "headshots" of individual flowers from my garden--below--are just supposed to be quick portraits of each one, little personality captures. So they are not really portraits, but more like mug shots. ;-)
I've made four of them so far. The first one doesn't count because it was a warm up, but by the fourth one I'd streamlined my step by step process, from photograph to finished laid out collage (none of them have been sewn down yet.) I took some photos along the way so you can see the stages I go through.
A snapdragon. I planted a lot of them this year.
I made a pencil sketch from my photo.
From this drawing I went to my favorite enlargement website, Rapid Resizer, and made a pdf file of the drawing at the size I wanted, printed it up, taped it together, and used it as my finished design. I took my individual pattern pieces from that.
Here you can see the taped pattern on my light box. I have already placed my blue background fabric over it and traced it, to help me place my collage fabrics accurately. I use a Flexion pen for this tracing step, because I get a fine sharp line that is instantly erasable with the tip of a hot iron.
Once that tracing is done, I start tracing individual shapes for my collage onto freezer paper.
These shapes are ironed onto the front of the fabric I intend to use.
Since the fabric for this piece is raveley silk, I interface the back of it first, before cutting out my freezer paper shapes. This is fusible knit interfacing, which I buy by the bolt.
This picture shows some shapes that are ready to be laid into place. You can see the traced pattern on the background that will help me with alignment. The great thing about using the Flexion pens is that you don't have to slavishly follow the traced pattern, as the line isn't permanent. What a help that is!
I use a little smear of a glue stick on the back of each of the fabric pieces, just to hold them into place. I really don't like to use fusible web in this situation, because A) I can't reposition fused fabric, especially delicate fabrics like silk and B) I like my collaged fabrics to be not quite so flat against the surface of the background fabric.
Here is my snapdragon, ready to have its stained glass leading put on.
The last step is the outlining, or adding the leading. I've covered that process in my book, Allie Aller's Stained Glass Quilts Reimagined. Click the link to find it on Amazon, or ask for it at your local quilt shop. It is from C & T Publishing.
There are two more...a lily and a rose.
Each is about 8" X 8".
I look forward to making more of these this summer, and hope this gives you some ideas for you to try too.
I've made four of them so far. The first one doesn't count because it was a warm up, but by the fourth one I'd streamlined my step by step process, from photograph to finished laid out collage (none of them have been sewn down yet.) I took some photos along the way so you can see the stages I go through.
A snapdragon. I planted a lot of them this year.
I made a pencil sketch from my photo.
From this drawing I went to my favorite enlargement website, Rapid Resizer, and made a pdf file of the drawing at the size I wanted, printed it up, taped it together, and used it as my finished design. I took my individual pattern pieces from that.
Here you can see the taped pattern on my light box. I have already placed my blue background fabric over it and traced it, to help me place my collage fabrics accurately. I use a Flexion pen for this tracing step, because I get a fine sharp line that is instantly erasable with the tip of a hot iron.
These shapes are ironed onto the front of the fabric I intend to use.
Since the fabric for this piece is raveley silk, I interface the back of it first, before cutting out my freezer paper shapes. This is fusible knit interfacing, which I buy by the bolt.
This picture shows some shapes that are ready to be laid into place. You can see the traced pattern on the background that will help me with alignment. The great thing about using the Flexion pens is that you don't have to slavishly follow the traced pattern, as the line isn't permanent. What a help that is!
I use a little smear of a glue stick on the back of each of the fabric pieces, just to hold them into place. I really don't like to use fusible web in this situation, because A) I can't reposition fused fabric, especially delicate fabrics like silk and B) I like my collaged fabrics to be not quite so flat against the surface of the background fabric.
Here is my snapdragon, ready to have its stained glass leading put on.
The last step is the outlining, or adding the leading. I've covered that process in my book, Allie Aller's Stained Glass Quilts Reimagined. Click the link to find it on Amazon, or ask for it at your local quilt shop. It is from C & T Publishing.
There are two more...a lily and a rose.
Each is about 8" X 8".
I look forward to making more of these this summer, and hope this gives you some ideas for you to try too.
Thursday, May 11, 2017
New Work Inspired by Stained Glass Quilts Reimagined
It has been glorious diving more deeply into the design possibilities of the two simplest projects from my book, Allie Aller's Stained Glass Quilts Reimagined.
The first project is "Leaf Vine", a twin sized bed quilt that uses the Iron-On Leading technique I teach in the book. It's so simple.
The basic concept of outlined leaf on a vine is what I wanted to explore further. And I did!
What if the leading was green? And what if the background was black? The result is super graphic and punchy.
 What if printed fabric instead of a solid color or black is used as the leading? In this small kids' quilt, the leaves are surrounded by large scale prints that have been cut to 1/2" wide. I think they look so playful!
The first project is "Leaf Vine", a twin sized bed quilt that uses the Iron-On Leading technique I teach in the book. It's so simple.
The basic concept of outlined leaf on a vine is what I wanted to explore further. And I did!
This is much smaller scale, a table runner. Some whimsical flowers were added to make this a stylized plant.
Another table runner, this basic block design was set in alternating positions. The same block is used in all the examples that follow, all looking so different!
I am one of those quilters absolutely in love with using wool along with cotton in quilts. In this case the background is cotton flannel. The leading is shiny metallic "Glitz" fabric, from Maywood Studios.
I love how this turned out: so yummy!
 What if printed fabric instead of a solid color or black is used as the leading? In this small kids' quilt, the leaves are surrounded by large scale prints that have been cut to 1/2" wide. I think they look so playful!
A detail of the kids' quilt.
I could keep going on and on with the leaves, but the possibilities of the very first (and easiest) project in the book, "Windy Sunshine" kept prompting me to sew....
This is "Windy Sunshine". As you can see, these are all simple square blocks, string pieced in style but actually appliqued, with couched leading. For my two variations, I switched my construction method to "flip and sew", because in the two quilts that follow, the seams are straighter--so there was no need for applique.
I think the fine black leading sets this quilt apart, gives it the slightest edge, while the colors are just plain ecstatic.
Because I live two miles from a Pendleton woolen mill, and because I love working with wool so much, I decided to make a variation in wools--with some yarn-dyed and repro cotton thrown into the mix. This version used the couched leading technique taught in the book.
#3 perle cotton is between the patches, and a nice dense acrylic yarn is between the blocks. This top isn't quilted yet. I would have to say, this one is my favorite!
All this sewing has been over the past two months or so. Focusing in and concentrating has yielded many surprises. I've enjoyed it so much....and just getting started.... ;-) I would love to see variations that you come up with too!
You can buy the book here. I hope you will!
Tuesday, March 14, 2017
"Mama's Voice"
The theme for the Quilt Alliance's annual fundraiser and contest this year is "Voices". It ties in with their commitment to record the stories of quilters and their quilts, so their voices can be documented, preserved, and shared.
It's a great theme! Learn more about the contest here, so your voice can be heard as well. It's great to know that proceeds from your quilt being auctioned at the end of the year will support this great non-profit.
I have used the annual contest, with its 16" X 16" format, as an opportunity to explore new ideas in my studio quiltmaking, and this year was no exception. I've long been intrigued by the idea of creating pictorial quilts as bona fide illustrations, and in this quilt, I gave it a try.
I didn't have a story in mind, but rather a scene I wanted to set....and the voice I celebrate is that of a mother reading to her child.
This was all new to me!
I started with a simple line drawing.
I decided to reverse it, and focus in on the faces, rather than showing the whole hammock.
Faces are tricky, I learned that quickly. And next time, I'll go lighter with the blue pen. It is hard to get that much disappearing ink to really disappear for good.
But I needed it to guide my hand embroidery.
Here are the faces partly done, and before I colored in the skin tone with colored pencil.
Then I got to put them "in context", suggesting the hammock without showing the whole thing.
Providing some shade for my readers seemed appropriate, too. These are collaged cotton leaves cut out from quilters' fabric, Broderie Perse style.
I'm starting to gather my floral embellishments, which will give a country garden vibe to the piece.
And here is the completed "Mama's Voice".
What are they reading?
You decide.......
I would love to practice more faces in the coming months, and see what other stories I can tell with my quilting. It's fun, and a real challenge.
You'll be able to bid on this quilt in the fall. I'll let you know when and where.
Saturday, February 4, 2017
Quiters' Winterfest Workshop Projects
I've been busy making new samples for the three workshops I'll be giving at the Quilters Winterfest in Frankenmuth, Michigan in a couple weeks.
"Stained Glass Flowers". Learn the central technique from my new book, Allie Aller's Stained Glass Quilting: Fresh Techniques and Design.
"Gothic Windows". Here are three variations on this block with so many possibilities.
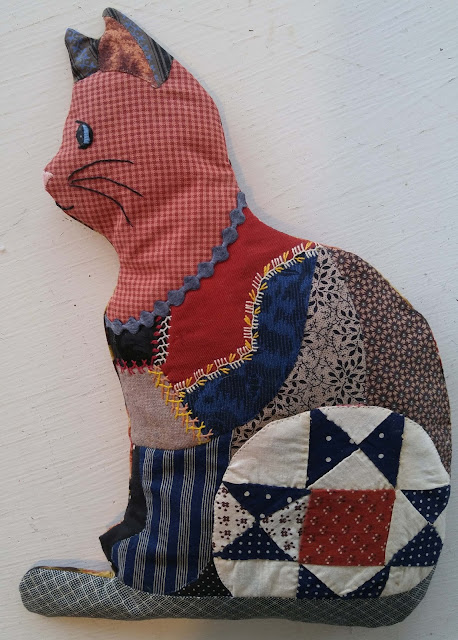
"Vintage Softie" employs vintage blocks and fabrics along with machine and hand stitching to create a sweet little critter. Elepants and cats are both offered because I couldn't choose between them!
There will be lots of creativity, new techniques, and fun...I love the people hosting the Winterfest and am so glad they asked me back this year. Hope to see you there!
Thursday, January 19, 2017
Road to California Exhibit is Up!
I had such a great crew to help me hang the quilts, enough space too. Thank you, Road to California!
Here are some photos of the exhibit, in case you can't be there. ;-)
All of the book project quilts are here, plus the Gallery quilts, and a few that I have made since the book's completion.
I am so proud of Allie Aller's Stained Glass Quilts Reimagined: Fresh Techniques and Design! You can order it on Amazon; it will be released next month!
....and I'll be teaching from the book next year at Road to California, so stay tuned..... ;-)
****************
And here is a lovely 2 minute video of the quilts made by Mary Kay Davis of The Quilt Show. Yes, I'll be taping about stained glass quilts with them next month in Denver!
https://thequiltshow.com/daily-blog/142-newsletter/25445-allie-aller-stained-glass-revisited
Thank you, Mary Kay and TQS!
Monday, January 16, 2017
Allie Aller's Stained Glass Quilts Reimagined: Fresh Techniques and Design. The New Book Quilts Are on Display at Road to California Jan 18-22, 2017
I am so thrilled that my new book will be released soon. Click on the peacock cover at your right and it will take you to Amazon to pre-order!
All the quilts from the book will be on display in a special Exhibit at Road to California this week. It is such a great opportunity for me to debut my work in such a fine venue.
I've made the three quilts below since the book was finished. These will be on display at Road too.
All the quilts from the book will be on display in a special Exhibit at Road to California this week. It is such a great opportunity for me to debut my work in such a fine venue.
I've made the three quilts below since the book was finished. These will be on display at Road too.
This is a couch quilt in progress. The "leading" between the patches is multi-colored, not what you might expect in a stained glass quilt.
A free form collage creates a more contemporary stained glass quilt look.
This detail from a more traditional stained glass quilt shows how effective using silk as "the glass" can be. My next post will be on the creation of this quilt, "Garden in My Window".
Meanwhile if you are at Road to California this week, stop by my exhibit!
Subscribe to:
Posts
(
Atom
)


