Showing posts with label techniques: crazy quilt piecing. Show all posts

Thursday, January 16, 2014

The Vintage CQ: Borders Constructed, 5 Years Later....

This quilt was begun in the summer of 2009.  I have made 45 blog posts about it!  If anyone is really curious and wants to see the individual flower blocks being made, and then the outer blocks, you can poke around
here, where the posts are all in one link.

This is the vintage crazy quilt that started it all.

How I wish I knew who made it or who owns it!  All I know is that when I first saw it, I instantly realized that I had to attempt a quilt based on it. Who knows why?  Love is not reasonable!

It was the border that made me put this quilt into hibernation from 2010 until 2014.

Not being a piecer, you can see why.  My friend Maureen Greeson even drafted the border pattern for me, but still I waited.

I think collaborating on our new book with my co-author, Valerie Bothell, whose work is so precise and logical, (and gorgeous) must have helped me tune up for this challenge.  Thanks, Val!

There are lots of technical issues, as you can imagine.  Working with wiggly, easily fraying fabric in small pieces was the main one; being accurate to the diagram, of course, was the other.  I'll share how I approached my task.

Because I am so used to working with a foundation, I decided to combine some "pre-piecing" of the units with machine applique.  Others would do this very differently, I am sure, but this is the only way that I could get a handle on this.  After tracing Maureen's diagram onto the muslin, and then interfacing it, this is the first "quadrant" being laid out.  I had traced freezer paper templates off the pattern for cutting out my shapes, and this worked very well.
I had sewn the units together...along their vertical lines.  That made the sewing easy.  The rest of the seams were ironed under, with the whole thing pinned to the foundation for sewing with clear thread.

Lots of pins....


For those chevron shapes along the outer edge, I sewed the fabrics together first, then ironed on the template and cut the shape out as one piece.  Then I joined the two halves of the chevron together by machine, matching where the seams came together in the center. This was doable!  The yellow triangles are appliqued on last.

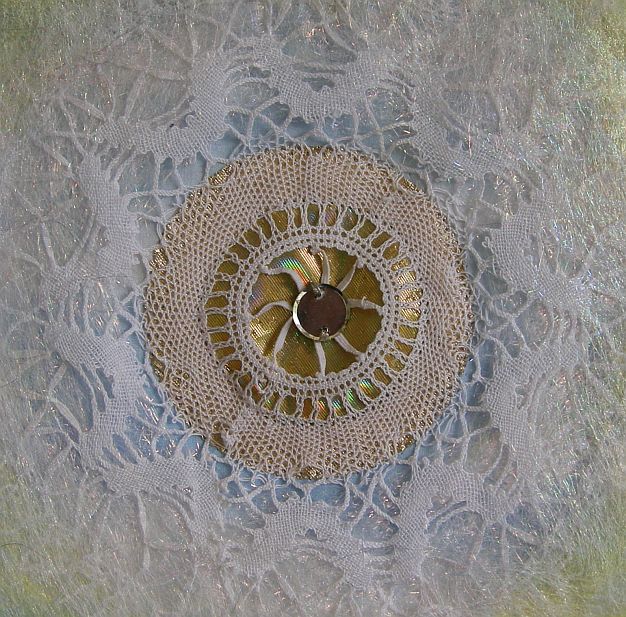
One of the things I loved most about making these borders was that I got to revisit my fancy fabric stash, digging into the bins for just the right color and texture.

No scrap was too small, either!  I was right to save them all!

I used interfacing ALOT as I went along, sometimes before cutting the shapes out, sometimes after.

I will not even attempt to cut silk charmeuse without interfacing it first.

But more stable fabrics, like the silk tie fabric on the left, are ok to sew but they will fray like mad.  So I interfaced that chevron wedge after sewing but before cutting.

The other fabric that demanded strict and non-negotiable handling was that notorious diva, velvet.

Interfacing and then pinning it about every 1/2" did the trick.

Take that, you velvet, you!

By the time I finished the second quadrant, things were going very smoothly.


Here I've started playing around with using vintage velvet ribbon to cover the raw edges between the rows of units.

By the fourth quadrant, I really didn't want this phase of my Vintage CQ to end...

You can see I've got ironing, cutting and sewing all within reach.  What you can't see are the piles of fabric all over the rest of my sewing room!

There were many sweet memories as I used fabrics from so many friends and from family, too. This is a distinct advantage of working slowly.  It gives plenty of time for reflection....


I call this the "Seidman Corner".  My Uncle Bill Seidman was in government under Ford and Bush 1...his FDIC and Treasury Department ties are in there, an American flag eagle, a medal from his time as an economic adviser to the President in the White House.  I am very proud of his public service.
The ribbon is from my Aunt Sally's sewing box, a beautifully woven commemoration of the Bi-Centennial in 1976.

So this is where I am now:

The quadrants and ribbons are all pinned into place on the design wall, just so I can see that everything will eventually fit together alright. (Again, thanks Maureen!!!!)
When it comes time to sew it all together, I will have those rulers handy so I can get everything exactly the same size, not just eyeball it like here.  (Again, thanks Val!)

But first I need to embrodier those quadrants....

I'll be using the same fly stitch that is featured in all the center flower blocks, in DMC's Satin Floss, which is rayon and therefore nice and glimmery.

With that, and all the tremendous amount of finish work ahead of me, this quilt has a long ways to go.  But it will be done this year, for sure!


Saturday, August 31, 2013

He's Leaving Home....Chad's Quilt and Pillow

Our son Chad has managed to buck the trend, and after spending 4 months back with us after graduating from the University of Washington, has gotten a really great job and moved into his own apartment.  It is 25 minutes away...not too far, but 5 minutes away would have been better! 
For a housewarming present I made him a large throw quilt and pillow for his handsome new couch.
Here is how it went:

He wanted an Asian them and warm colors; I got permission to add a few spikes of blue. That pile of white fabric you see above the iron is leftover muslin squares and rectangles from other projects; I figured I'd use them up.
This resulted in the quilt's lay-out, which I like very much!  Couldn't have thought it up myself otherwise.

Here they all are pinned up on the design wall.  After doing some beginning "piecing"--it is really Intuitive Applique, Method 4 in my Craftsy class--I decided to pin up some major elements like the large chunks and the blue bits so that down the line the quilt would actually have a bit of balance.

Moving right along here!

Once I started sewing it together, I got a sense that this quilt was really going to work ok!  I loved using fabrics from my stash...silks from our trip to India, Kimono silks from a generous student, sample linen from a friend, quilters' cotton, some trims I'd gathered along the way...I loved putting them all together.

I found this scrap in the bottom of my brown/black bin where it had been waiting for years....

Squaring up the blocks...

.....gave me lots of trimmings!

The top was really pretty easy to assemble.

It looks formal here, but it is about to be transformed into a snuggly couch quilt!

But first I decided to make a co-ordinating pillow from some of the scraps.  I used a fairly uniform mid-value and stayed with the gold/orange part of the palette.
What you see here are scraps that have had their overlapping edges ironed under.  Those ironed edges then received a light smear of Tacky Glue and then each piece was just smoothed into place on a muslin foundation.  Collage work, very fast, very fun.

 The glued patches were totally secured into place with the quilting; I'd spray basted my collage onto a piece of flannel drapery lining and then around and around I went on my Sweet 16.

It finished out at 20" X 20", with a black linen back....to match Chad's couch, of course!

OK, back to the quilt.  I wanted it to be cozy, so for the backing I used a plush microfiber throw that I got on Amazon.
It made for a wonderfully functional throw, too!  Colorful and kind of classy on top, cozy and yummy on the underside, lightweight but warm.

Quilting on such a stretchy back did distort that perfect rectangular quilt top though.  Gotta work on that for next time...

  Pretty cozy looking, isn't it?  ;-)

It was very fun, delivering them....

....and so satisfying, seeing them in use.

Makes it easier, having an Empty Nest, knowing my fledgling's nest has a comfy quilt in it.

Next up, a baby quilt for my great nephew!  Sewing for publication is very rewarding, but sewing for family is the best...


Friday, July 5, 2013

The Lace Quilt

While I was in the middle of preparing for my Craftsy class I decided to take a time out to make a quilt using one of the methods of building a block that I was covering in class.
I called it "Intuitive Applique"; it is Method 4, in Lesson 5.

This is my all time favorite way to work, making up each block as I go along.  And I don't get to do it all that much!  Because while a crazy quilt's blocks' construction goes quickly, embroidering and embellishing them takes weeks if not months. The "piecing" part---working with fabrics and the blocks' compositions--is just a small part of the process of making a crazy quilt.

Not this time!  My goal was to make a bona fide crazy quilt with no embroidery at all.  The only handwork involved sewing on some pre-made fabric flowers from those folks I love at M & S Schmalberg. Otherwise, everything was done on machine, including quilting and binding the quilt at the end.  The intricate patterning in the laces and all their variations would fill the role that embroidery normally does.

And this quilt was completed quickly.  I started it on April 25th, and finished it on May 3rd. What a deliriously fun time I had!

I took pictures along the way so I could share my joy.....

This is where all my quilts start, with "blank pages" on the design wall.  These are interfaced muslin foundation squares.  The lace in between the rows will be my sashing strips.  I'll take each square down and work on it, then pin it back up.  This helps me see the quilt as a whole, all the way along.

One of the first blocks is getting underway here.  Working with that textural crocheted lace was making me swoon, for real!

I stayed with my "Craftsy palette" the whole way through this quilt, using the same "Paris Flea Market" fabrics from Moda that my class project used. (The designers are 3 Sisters.) I fell madly in love with these fabrics, and it was extra cool that they are about Paris, where I'll be traveling in September.

I've got the block roughly laid our here.

 That block sewn up is fourth from the top in the row on the left. 

Although this quilt has very little structure, other than having a strip-and-sashing lay-out, I still wanted to organize it's randomness a little bit.  A mandala block in the center seemed a perfect way to accomplish this.

From this point on, all the blocks I made were in response to the ones already there; that is, I was working on keeping the quilt balanced.  I especially had to pay attention to that dark red rose fabric, and try to keep it distributed fairly evenly across the quilt.

I had to pay attention to the lines within each block as well, so that the curves would flow nicely from block to block.  So I decided to lay out the laces first!  (Notice that I layered them sometimes too.)
 
That strategy worked just fine and even made the block go together quicker.

See that map of Paris fabric in the upper right?  As I worked I imagined going to the places on the maps as I cut and sewed...

The blocks are almost all done here, and I was sad that my whirlwind week of piecing was almost over.

When it came time to add the sashing between the rows of blocks, I didn't want them to be static..and thought that alternating the background fabrics behind the lace strips would be a subtle way to add a hint of pattern and interest.

When all was assembled, I quilted along the sashing and between the blocks...no quilting inside the blocks.
I did use a lovely backing fabric and lightweight cotton batting; this is intended to be a functional throw.

And here it is, finished.  I used a linen burlap ribbon for the binding...that made it very fast and the texture fit the quilt very nicely.  It measures about 64" X 64".

This was like a week's vacation for me!  I loved working with my lace collection so much that I'm going to have to make another one of these someday.  Hope you enjoyed reading about it!

Sunday, October 23, 2011

CQ Borders for the Flower Experiment

I made some borders to surround the printed photo from my pounded flower experiment.  It was so nice to work with these bright colors...a way to thumb my nose at the gray skies descending I guess.

I plan on working these seams and adding a bit to the center while on vacation this coming week....I have no idea where this is going to go, but I know that I am going to the beach!

Friday, June 24, 2011

"Rainy Spring"...Assembling the Center

As I was trimming my blocks and re-pinning them up on the design wall, I happened to pin one of the center blocks upside down.
It was one of those accidents that changed the direction of the quilt in a fairly big way!  I decided to make the center into a circle, truly representing our seemingly absent sun.

I knew that I had to complete the circle shape though, and that required some fairly technical surgery this morning.

I began by sewing the blocks together, but leaving the seams open where the appliqued little quarter circle shapes would go in.  I knew I had to line them up perfectly, and wanted to have as much control as I could.

 First I had to make the four little corner lace collages.

 Then I pinned them in place and appliqued them along both sides of the corner of the block.

 The ribbon was carefully pinned into place and sewn down, so that when the center blocks were completely sewn, the circle would look round and continuous.  Dicey!!!


Not too bad.

Here is the center sewn together, fairly well pressed, fairly round too.  *Whew!*

But I still needed some sun.  We all know it's there, behind the clouds....

 The Accuquilt Go! cutter is absolutely invaluable when perfect circles are needed, in this case out of holographic and bonded lame.


And then I dove right off the deep end.
A long time ago, I saw a quilt by Terrie Hancock Mangat where she painted all over it after the whole quilt was done.  I thought that was so gutsy of her to do that.  So what the heck, I decided to fuse some Angelina fiber over my finished and assembled center blocks.

No going back! Especially after I fused down my Angelina layer with this great new product from Shades Textiles, a very very fine fusible web called SoftFuse.  I got it at Quilt Market.

Oh my.
Could this have actually worked?

I think so.  When the real sun shines on it this glows.  ;-)  Wish I could capture that here in a photo...the quilt actually looks much more yellow-ey golden green than this...


...like the trees do at the end of the day when the sun slips in under the clouds, sideways, and lights everything up.

I took quite a flyer at this stage of my quilt, and could have crashed in disaster.  But it was very fun to take the risk! Now maybe I can finally sew the rest of those blocks together...