 As always, you can click on the picture for a closer look.
This is a good time for me to go on a blogging holiday...so I will be back on New Year's Day, 2008!
A blessed and joyful holiday to you all...
As always, you can click on the picture for a closer look. First I had to interface the jacquard silk I am using for the pretty back so it wouldn't be so wiggly, and also to prevent the ridges from the basting lines from showing through it once it is in place. In this picture I was just cutting out the interfacing....fusing it on on the ironing board took quite awhile, to get it on there with no bubbles, etc.
 The elements are pinned into place, to be whipstitched down. Then I will add the final embroidery to tie it all together.
 Max's girlfriend, Esther, is with us for the week. They look very happy, don't they? Ah, to be 21.
 It was a "Stained Glass" style wall hanging, which finished was 12' X 17' (3.65 meters X 5.18 meters). I had to dye paint all my fabric with procion dyes before beginning constructing the hanging, as I had heard those dyes are the most resistant to fading. Here I am ironing down some of the "leading", which in this case was bonded gold lame that had wonder-under fused to the back before it was sliced into long ribbons. You get a sense of scale of this thing when you look at the next picture.
 I constructed it basically in two halves, then joined it at the horizon line, with the tree trunks "leaded down" after the two halves were joined. Of course all the leading is sewn down with zig zag clear thread.
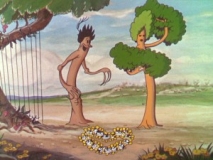
 Here it is completed and stretched over the unsightly soundproofing tiles and mounted into place. Those of you familiar with the work of Louis Comfort Tiffany will recognize the main elements of the design....the trees on the right look more like they are out of "Flowers and Trees", an early Disney "Silly Symphony", however!
 The quilt has been blocked square--by pinning it to the carpet with many measurings, and then blasting it all over with hot steam from an iron held about 4" above the surface. I let it "dry" for two days, then pin basted it with the drapery lining "batting" and the muslin false back. You can see the close basting is underway.
 The components of the label will be appliqued onto the fancy back, and tied together by more overall embellishment. I do think H would laugh if he saw all the froo froo hearts and flowers I put around him! But too bad for him.....
 Binding treatment supplies. I have such fun plans for these! It will be my dessert and reward for getting all the finishing done.
 The writing will be printed on another piece of fabric and appliqued at the bottom edge of this.
 So out they came.
 Old-time readers will remember how I snuck taking this picture while deep in the aisles of Powell's Books in Portland. I didn't want to buy the whole book, so....I engaged in some espionage. I do enough business with Powell's that my conscience doesn't feel too badly...
 Here is an early lay-out. I went through several.
 What a technical nightmare this was. Getting this all square and straight has been a battle all the way along.
 This was as far as I got at John Campbell.
 The interfacing behind the H was ready made for trapunto.
 Nothing to it...three layers of batting used here.
 For the fans it was a simple matter of cutting the batting layers to size, and fusing the interfacing over the layers....
 ...like that.
 It hangs better..the blades aren't floppy anymore...they're not too busy with the beads....this is going to have to do it!
 The bottom right corner of the quilt...
 I had to sneak just a little of my printed flower fabric in here. Just a little...
 ...and my initials...
 Martha Green made the FIMO geisha girl. Hard to believe I started piecing this quilt while at the John Campbell Folk School in Martha's workshop, back in June of 2005. "The Fan Quilt" took a long siesta during "Crazy for Flowers" and the "Summer Mandala"...and woke up as "The H Quilt".
  Except for beading all the fan blades...my friend Judy said she knew this was going to happen, but she didn't want to tell me....
 Some of the beads I used were really small! These are mixed sizes 20 to 24. (Sorry I wasn't able to get any other way of sizing them while at Beadcats. You can just call these "dust" and it would be pretty accurate.)
 Top row, left to right....
 I am going to have hell to pay, getting this all evened up properly, I know....
 I had to put that airplane in for Robert, of course.
 One more row of blocks to go!
 That's my bead soup in the upper right.
 The left hand side of the quilt's border is now beaded...starting from the bottom and moving up....
 Ah, Elvis. How did he get here? He sure is cute, isn't he? And that looks to be a handknit sweater he's wearing....
 My friend Willa gave me this butterfly fabric, and it always makes me think of her...
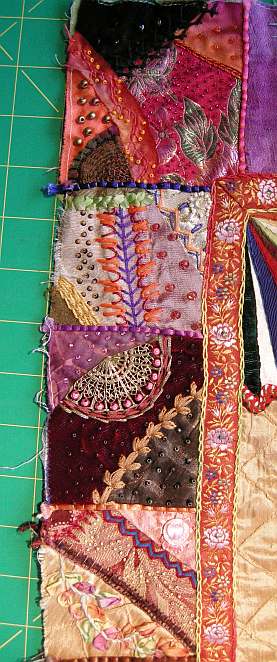 Halfway done now with the border blocks!
 Thankfully, most of these were deeply discounted....we'll see how they work. Nothing like designing in the heat of a shopping trip.....


