Monday, June 25, 2018

"Memories that Linger"...Part 7, Finishing

Many steps have been accomplished between now and my last post.  The project is at last complete!
I will lead you through my process....

Where I left off in my last post....there were no flowers along the bottom yet.
The scarves you see in the picture above have great significance at Camp Newaygo.  Each color represents a specific group of campers, according to age.  You are presented with your scarf when camp begins, and hand it on at the end of camp.
The camp's director gave me one of each scarf to incorporate into the quilt.  When I asked what order they should be in, she made a spreadsheet!

This is one organized camp director!!

I used my Accuquilt Go Fabric dye cutter to cut out the leaves and flowers.  If you look at that flower die on the right, at the top of it is the four petaled flower shape I used.


Once all the flowers were cut out and arranged (in order!) along the bottom of the quilt, I outlined them all with black "leading". For any new readers, that technique is in my book from C & T Publishing on stained glass quilting.
Sewing down all that leading took awhile, and the weather had gotten so nice that I moved operations outside and spent all day under the dogwood sewing.


And here they are all in place. I made the colors overlap each other a little, to symbolize how a girl makes transitions as she grows up... ;-)


Next it was time to add the picnic table.  In real life it is in the center of the three cabins, but design wise that wasn't going to work.  I wanted it in the foreground....my sense is that table is kind of an institution...so much happens around it!  So I wanted to give it symbolic pride of place.

Here is how I "built" it: 

At first I had thought to use different colors of brown fabric, but realized quickly that a better solution was to make it out of a whole piece of light colored silk, and then shade it with colored pencil. Then I carefully leaded it, cut it out, and appliqued it into place.

 
With the top at last complete, it was time to quilt! I used my Handi Quilter Sweet 16 which functioned flawlessly and enabled a lot of intense quilting over the entire surface.

 
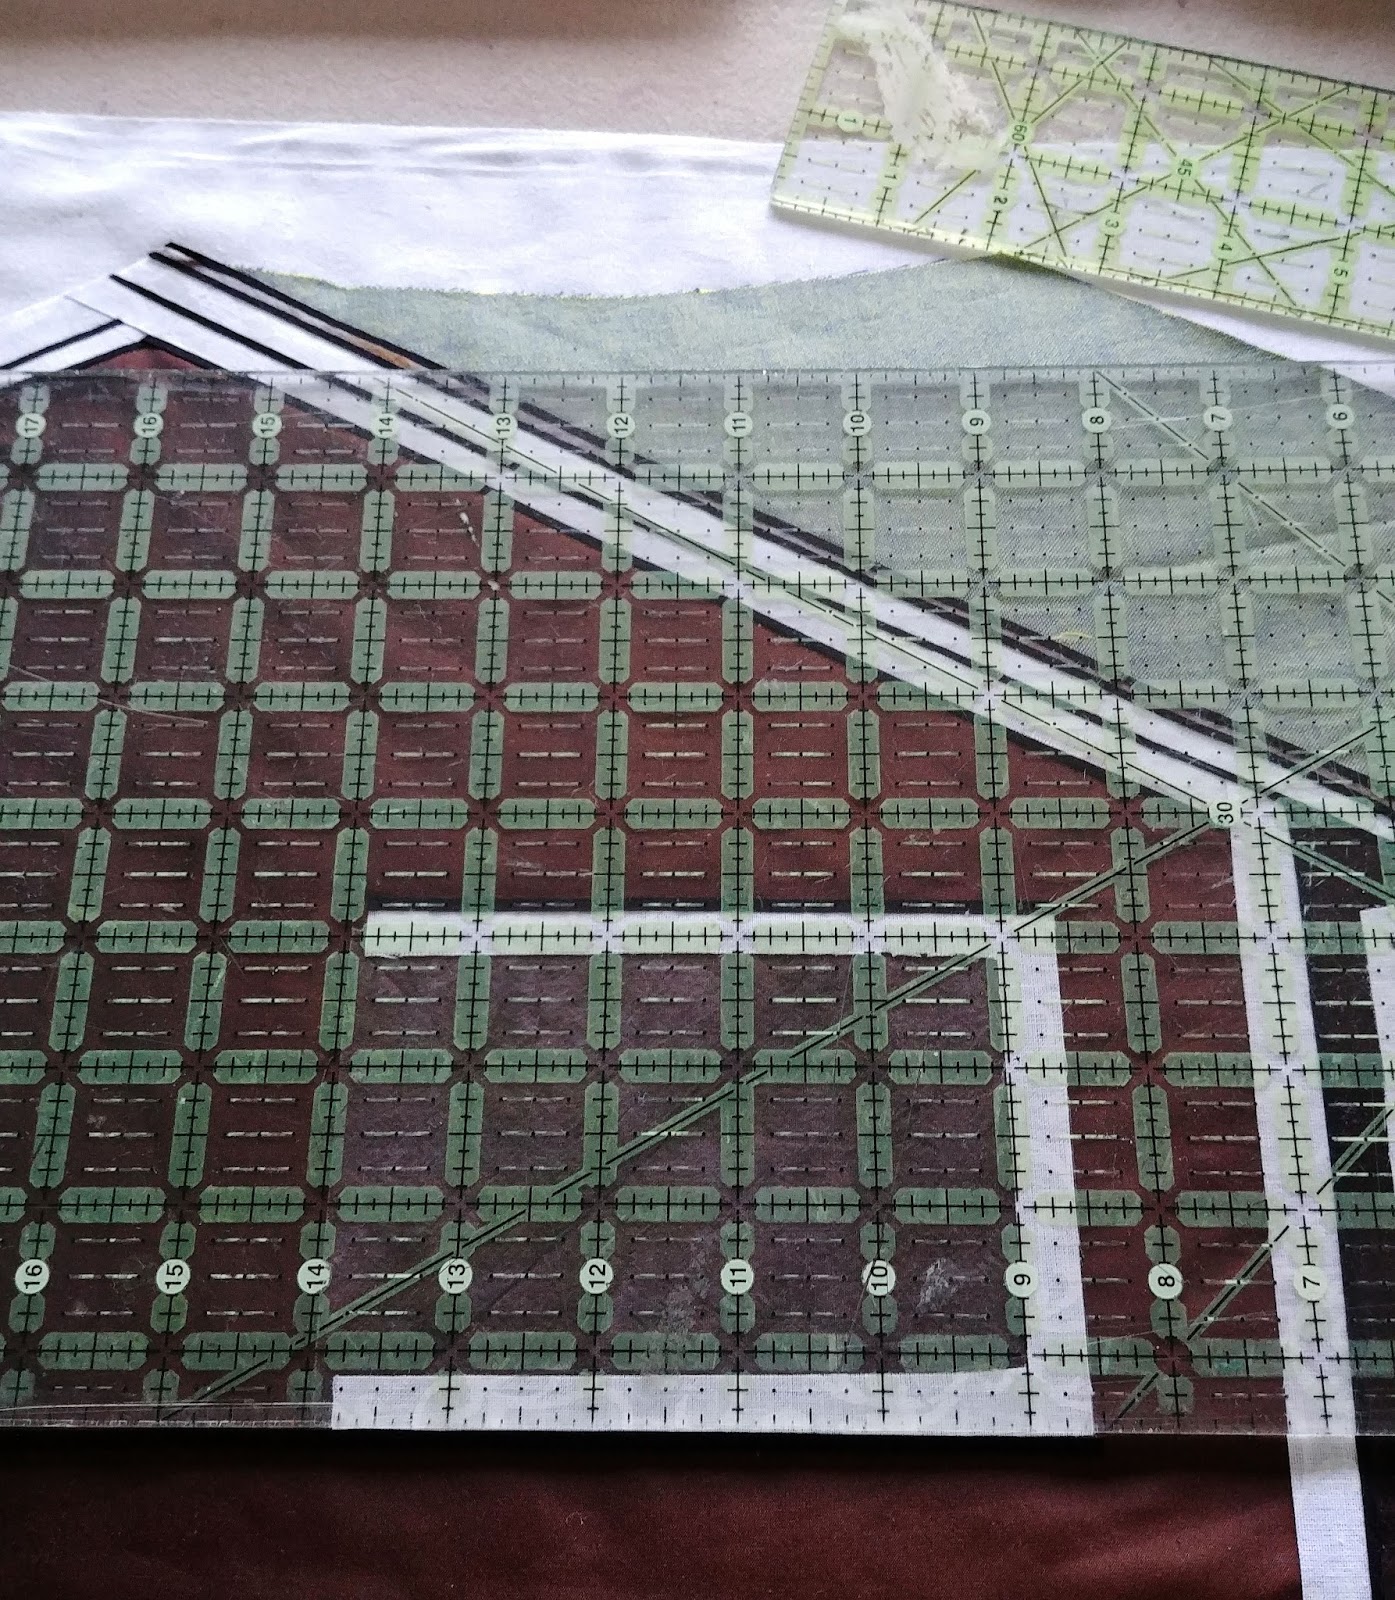
Finally it was time to square up the quilt and trim it as accurately as I could.  I used my rulers and my new cutting mat with its perfect 90 degree corner to draw my cutting line. Notice how I have stretched the quilt as flat as possible by taping the quilt backing to the floor.  Wide painters' tape works great.


I decided to create a faced edge rather than use binding.  In the picture below I am sewing on one of the facings.  This was done before trimming off the excess--the sewing is way more stable that way. You can see the quilting in this nice morning light!


I ironed the facings to the back and whip stitched them into place by hand.  Luckily, my Dodgers are on a winning streak this June, so watching some games while I handstitched was great. 


Then came the sleeve, also sewn on by hand.  That extra fabric is to account for the dowel that will be used to hang the quilt.


No quilt is complete without its label.
This one has a little story.... 


My friend Anne, who with her sister commissioned this quilt, sent me this shirt while I was working on the quilt.  When we were 19 years old (over 40 years ago), I had snuck it out of her closet, embroidered it, and mailed it back to her for her birthday, which is in the fall.
She wondered if I could include any of the embroidery in the quilt.

 
I did include a bit of it in the label...and the fabric with the writing on it is from the shirt as well.
I felt super bad when I realized I had misspelled "commissioned" and had to correct it...I was going to redo it but then just decided it was pretty authentic the way it is! 


The very final step was attaching this cording to my finished edge.  I wanted to add that final definition to my composition.  Again, I was stitching under the dogwood and I had the Dodger game streaming on my phone!
Anne and her sister Ellen have lives in baseball too--being deeply involved with the West Michigan White Caps--so we all loved the sharing our love of the game during the making of this quilt.

It is going to hang here in the lodge at Camp Newaygo, over the stairwell:

Every time campers or conferees or wedding guests (all people who use the lodge) go down the stairs to the rest rooms, they will see it!  ;-)  This space gets no direct sunlight so the quilt should hang there safely for many years.


And here it is, finished.  It is around 68" X 78".

This was an immensely meaningful and personal project for me, and I haven't written much about that side of things.  But maybe one night when it's late I'll sit under the dogwood and type the tale here (most of it!).
In the meantime, it has been a blessing indeed.  Thank you for following along!

Tuesday, May 8, 2018

"Memories that Linger"...Catching Up, Part 6

Well, obviously I am doing a whole lot more sewing than blogging about this commission for Camp Newaygo in Newaygo, Michigan.

I've come very far on this project since my last post, so I thought I would just post a long sequence of process photos so you can see what's been happening.
Here we go....

 The cabins in place over the full sized pattern.

Now on the muslin foundation fabric.

 I started roughing in the woods behind the cabins, the yard area in front, and the trees of course.

I leaded the trees first, and the background woods were mostly in place, but I ended up taking out some of the blue sky in the background as it didn't "read" very well.

When the background woods were finished, I began to add all the foreground leaves.

Here is the central scene all laid out up on my design wall.  The chair gives a sense of scale.

Sewing all that leading down took some time.  It's a good thing I've learned how to zig zag backwards!
(This technique is covered in my book, Allie Aller's Stained Glass Quilts Reimagined.)

It was certainly slow and careful going, sewing down all that detail on the cabins' porches.

Once everything was sewn down, I used my full scale drawing to add my trim to the perimeter of the scene, cleaning it up nicely.
Next it was time for the lettering, above and below.

On a gorgeous spring day, I cut out my letters while sitting in the garden.

The letters got double leading!

The upper banner is in place, against a beautiful sky hand dyed by Stacy Mitchell of Shades Textiles.http://www.shadestextiles.co/

I set up some tables so I could lay the entire piece out while I worked.  This was invaluable. Then I'd pin it up on the design wall to have a look.

The ground area came next.

It has a banner too.  It took a lot of measuring and careful pinning to get those curves smooth and even.

And here is where I am now. This picture distorts the view a little--the letters are the same size top and bottom.
There are some flowers now to add along the bottom....

And now you are caught up!
This has been a challenging project and incredibly rewarding.  I've loved every moment of it.


Friday, February 2, 2018

"Memories that Linger"...Part 5: Outlining the Cabins and Auditioning Fabrics

After the cabins were "built", it was time to add the leading...this will be a stained glass style quilt, after all.

Adding the leading to Cabin #1

To learn how I do this technique, pick up a copy of my book, Allie Aller's Stained Glass Quilts Reimagined, from C & T Publishers, April 2017.
As you can see from this detail image below from one of my quilts in the book, you can get very articulate with this leading technique! 

Detail from "The Parish Farm", pg 43 of my book. This section is 16" X 25".

To prepare the "tree fabric" for my large hanging, I felted some strips of cotton base fabric with hand-dyed wool and silk roving.

Roving fibers laid out on a cotton base for felting.

Once the cabins were leaded and the tree fabrics were ready, I pinned everything up on the design wall, directly onto my paper pattern, with some of the other background fabrics too, just to see how they might work.

Trees, leaded cabins, and woods/foreground fabrics pinned into place.

There is much work to be done, of course, but this was my first glimpse at how my piece might come together.
It's very encouraging!

But it will have to wait a few weeks, while I am off on an adventure.....

Sunday, January 28, 2018

"Memories that Linger..." Part 4: "Building" the Cabins

The focus, heart and soul of this project for Camp Newaygo is the grouping of these three old cabins.  They are driving the entire piece, so I wanted to "build" them first.

Here are some of my construction tools!

 Spray adhesive, masking tape, marking tools, exacto knife, gluestick, rotary cutter, magnifier, remotes, scissors, ruler, cutting mat

I've been wanting a large lightbox for years, and this project was just the excuse I needed to finally buy one, from Amazon.
In the photo below I have placed the area of the large full scale drawing I wanted to trace, the cabin (#9) on the right, over the lighted surface.  Over it is a layer of muslin, which will be my foundation fabric.  Having the design traced on the muslin will help me orient placement of my cabin fabrics as I collage them into place.

 Muslin over pattern on lightbox, with photo nearby for reference as I trace.

The next step was to again trace the cabin design, but this time onto freezer paper.  I use this to sometimes cut out actual templates, sometimes for tracing a specific shape onto tracing paper for then cutting out a shape, and sometimes to help me place an element exactly on the collage.  

 Cabin #9 design traced onto freezer paper.

The big pieces go on first.  Everything has to be lined up as perfectly as I can get it.

Cabin #9, under construction.

After much trial and error, I learned that the best way to make those window frames was to cut them up from a single piece. Using the exacto knife made this possible. Because these frames are so delicate, the white fabric has been prepared with fusible web.  This prevents the fabric from fraying and also assures the frames will stay put when I have positioned them exactly where they need to be.


Cutting out the inside of the window frame, through the tracing paper.

Another helpful discovery was to use the holes from the windows cut from my freezer paper tracing to help me "register" their placement onto their background fabric.  (Alas, the lightbox could not shine through dark brown silk taffeta to help me see the tracing on the muslin.)  This worked really well.

Placement of three windows using the freezer paper.

The picture below shows Cabin #3 well underway.  (Sorry it is so blurry.) Some of the pieces are held in place with spray adhesive, others with fusible web, and others yet with gluestick.  It just depends on the situation.

 
Cabin #3, the collage underway. 

I was constantly referring to the printed photograph I am basing this composition upon, using that slick lighted magnifing glass to peer as closely as I could into the actual construction details, especially of the railings and the steps.  I really want this to read properly.  The eyes of my future viewers will catch anything false!

 Magnifying the steps on Cabin #1.

I learned so much while making my first Cabin #1, that by the time #2 and #3 were done, my original Cabin  #1 looked pretty rough in comparison, so I did it over. There will be trees added in the foreground in front of the cabins and behind them in the background, which will help seat them into place.  Right now they look like they are floating. Of course there will be the foreground area with the picnic table too, but that will be created last.  In landscape quilts I always work from back to front.

 Cabins #1, #2, and #3, collaged on muslin foundations and taped into place on full sized pattern.

This was painstaking work, but I really enjoyed it. 

The next step is to add the "leading", that is, the black outline, around all my shapes on these collages, because this commission is going to take the form of a stained glass quilt.  But I am going to let these rest for a day before tackling that--it, too, will be a demanding and painstaking process.

Then I'll be able to start in on the background woods. That will be much more spontaneous!


Monday, January 22, 2018

"Memories that Linger..." Part Three: Creating the Design


When I was asked to make a wall hanging for the newly refurbished and expanded lodge at Camp Newaygo, the first thing I had to know was where it would hang. I love site specific design very much, and my design process was going to be based on the location of my piece.

I traveled to Michigan and got to stay with my old friend Annie, and she took me to camp for a tour. Though I have years of happy camp memories from my youth, I had never been to Camp Newaygo.
I needed some real time visuals, not wanting to work from someone else's photos.

I also knew that I wanted the focus to be a very iconic image from camp.  The lakefront with the dock and all the canoes?  A campfire? The path through their wetlands?
All good but no....it had to be the cabins, the oldest ones there, built when the camp was founded in the late 1920s.
These are cabins #1, #2, and #3.

Cabins, #1, #2, and #3, Camp Newaygo, Michigan
 
When I think of the hundreds and hundreds of girls who have called these cabins home, in that special girl-power reality that is camp...all the friendships, the fun, the longing inherent in those adolescent years, (and the concomitant endearing and exquisite dramas)--and most of all, when I remember my own growth and happiness within the rustic outdoor world that made camp so special....I just knew this was my scene.

Then it was on to the lodge to pick a spot.

One of the large spaces in Lang Lodge, Camp Newaygo, Michigan

The large rooms in the lodge have walls of windows and are full of light--a very great thing but not so great for textile wall-hangings, (fading is the issue) not to mention the special events held in these spaces that would require my wall-hanging to be moved often.  So I kept looking and recognized the perfect spot as soon as I saw it.

Stairs down to the new lower floor, Lang Lodge, Camp Newaygo, Michigan

That wall above the stairs is perfect.  It gets no direct sunlight, and will be a nice large area to fill with color, memory, and meaning....that's the plan, anyways!
My design could be very large, about 62" X 78".

I did use my photograph of the cabins to develop my drawing.

Edge detection from cabins photo

I confess to having flunked Photoshop the three times I tried to learn it, but I can handle a freeware program called Irfanview.  I used it to get this edge detection from my cabins photo.

Then I took the edge detection jpeg and ran it through a program I like so much that I pay for it every year, called Rapid Resizer.  I was able to enlarge my edge detection and print it up to a 14" X 18" image, and traced my design off of it.  The only change I made was scooting cabin #9 toward the center just a little bit, for compositional purposes.

I asked Anne and Ellen to choose a phrase that would be meaningful to everyone connected with camp.  I like words on quilts.  After what I am told was a serious and protracted family discussion, they chose a phrase from a favorite camp song, "Witchcraft".  We used to sing that same song at Camp Arbutus. Memories that linger/Constant and true was their most excellent choice.

As I was working with my design, I had some trouble with the lay-out.  I messaged my Facebook friend Ginny Maxam, a graphic and card designer whose compositions always are so pleasing to me.  She steered me in the right direction, suggesting the central image be an oval with the phrases surrounding it like a hug.  Thank you, Ginny!

 
Working drawing, "Memories that Linger"

Above the central scene will be a twinkly night sky, and below some of the wildflowers that grow at camp. Some of the details and the font may change, but this is pretty much it.

I'll be assembling my scene collage style on a muslin foundation. Because I took such care to get the proportions of the cabins right, I wanted to blow up my drawing to actual size so I could make actual freezer paper templates for cutting out my fabrics.  

So my next stop was FedEx/Kinko's, and their sweet wide format printer. 

Full scale pattern, "Memories that Linger"

And here is the pattern, ready to work with, up on my design wall.
The next step is to build my cabins, the subject of Part 4 in this series.


Thursday, January 18, 2018

"Memories that Linger"....Part 2: A Warm Up Exercise


In Michigan, camp takes place in the woods. 

I live in the Pacific Northwest now, and though this is indeed tree country out here, the feel is obviously very different, especially in scale.
So I did a little warm up piece to start to get myself back into the Michigan woods like those above.

I started with a background, needlefelting hand dyed silk fibers from Treenway Silks and bits of silk and wool fabrics onto a base of printed cotton.

 6" X 11" background prepared with felting

Then, because the hand was still so easy to stitch through, I developed two representative trees...just to start thinking about them as I embroidered....

"Conifer and Deciduous" Copyright Allison Aller 2018

Because my wallhanging will be 5' X 6', I don't think I'll be able to go into this much detail....but one thing leads to another.....