
Thursday, June 14, 2012
Laura's Trees
I have to admit, when I visit relatives it is fun to see some of the things I have made for them up on the wall..it's like visiting a few old friends a little bit, too.
 I made this for my sister-in-law, Laura, three years ago...it's about 8" X 10". This was all constructed with the machine embellisher (felter), with hand embroidery over it. It's so nice to see it on the wall in her guestroom!


Friday, June 8, 2012
A CQ Scrap Experiment
I was lucky at Empty Spools to visit the classroom of Susan Carlson...you all know her work, she is amazing. Her collaged fabric quilts are fabulous...just think "pink rhinoceros" and you know who I mean!
Watching her students working and collaging their fabrics made me wonder why I couldn't adapt the method to crazy quilting. Experimental crazy quilting....
Why not just adhere my scraps onto foundation with a little bit of glue?
 You can see the scale here is quite small. My foundation muslin is 6 1/2" X 10 1/2".
These scraps are the little precious bits from my Moon over Hood project that I could not throw away.
 They are all laid out with overlapping edges...but just held in place with a little glue in the center of each patch. The edges of the fabrics are trimmed, but raw.
This was obviously quite fast.
The real experiment was to find out how adding machine embroidery on the seams--in crazy quilt fashion--would look, and how well it would secure the edges of the fabrics.
 I think it worked great!!!
I used Aurofil machine threads in a size #12, and some of the built in stitches on my old Pfaff machine....nothing fancy.
For a quick project using your precious scraps, this is pretty darn fun. Try it, you'll like it!
Watching her students working and collaging their fabrics made me wonder why I couldn't adapt the method to crazy quilting. Experimental crazy quilting....
Why not just adhere my scraps onto foundation with a little bit of glue?

These scraps are the little precious bits from my Moon over Hood project that I could not throw away.

This was obviously quite fast.
The real experiment was to find out how adding machine embroidery on the seams--in crazy quilt fashion--would look, and how well it would secure the edges of the fabrics.

I used Aurofil machine threads in a size #12, and some of the built in stitches on my old Pfaff machine....nothing fancy.
For a quick project using your precious scraps, this is pretty darn fun. Try it, you'll like it!
Saturday, June 2, 2012
Empty Spools at Asilomar, California
If you ever have the chance to attend Empty Spools, do it!


Then it was time to hang my show and set up my Artist in Residence "station". Each session of Empty Spools features an A.in.R.--he or she shows her quilts, gives the opening night presentation, and then works away where people can come by and view the process, ask questions, and in my case, give very helpful suggestions too!

You will notice that the architecture of the hall is spectacular, as is the whole conference center.

Asilomar is a classic example of the Crafstman style.
I would start my day by the fireplace in the Social Hall...


My presentation Sunday night was fun to give and my audience seemed interested...I could tell because they came up to examine the quilts afterward!


Also right across from me were Gayle and Suzanne, the owners and administrators of Empty Spools.

I made some new friends, which is one of the best parts of attending quilt gatherings.

Joyce Becker and Anna VanDemark, two more astounding teachers, were at that dinner too...
I'm sorry I can't give an overview of all the great classwork that was done by the over 200 attendees last week, but I stayed close to my table and worked!

Thanks to everyone who was so gracious to me last week...
Friday, May 18, 2012
Finishes...and lots of travel
I've enjoyed seeing lots of family in the last few weeks so haven't been too productive in the sewing room. But gosh has it been fun. My boys showed me a wonderful time in Seattle last week-end!
 (Max went into the html on the blog here and widened everything, making it easier for you to read, I hope!) Max is on the left...he works as a software engineer at Amazon; Chad is on the right, a senior at the Foster School of Business at the University of Washington. They live 3 miles apart from each other and get together often. That makes this mom REALLY happy! ;-)
Because I am heading for the Empty Spools conference at Asilomar next week-end, I have some finish work to accomplish. As "Artist in Residence" I do want to have my most current work to show and tell about.
So "Rainy Spring" is now done....
 I took a long time picking out the backing at Fabric Depot, but finally settled on two fabrics to layer together, and aqua poly satin and some glittery netting! It looks nice and rainy but it does leave a bit of a glitter trail.
To bind it, I folded the back over to the front and stitched it into place, manipulating the fabric in the corners to some semblance of a miter. I left the edge raw, then covered it with some narrow trim (more glitter!) and a row of herringbone...
 I wouldn't say this is aces technically, but I do like the overall effect...from a distance!
 So this is now done, except for sewing on the dreaded sleeve!
Now I am working on the Cowgirl CQ....
 This is my kind of machine quilting...I simply pinned my top to a washed microfleece blanket from my local BiMart ($20 for a kingsized), trimmed it to size, and am quilting in the ditch with clear thread, strait lines, no free motion anything, even stitches...
I would have liked a slightly better color but BiMart is close and this is going to be a working quilt on a ranch....not precious! And I have to say that the top quilted onto microfleece this way yields more of a "bedspread" weight than a quiltlike feel, and it is REALLY nice! I have one on my bed and I love it.
So I'll be quilting all day until my husband calls me out to the garden to help plant the onions...
 This is Robert's idea of a blank design wall!
I definitely plan on blogging from Asilomar, so next time I'll be posting from beautiful Pacific Grove, CA...
Bye for now!

Because I am heading for the Empty Spools conference at Asilomar next week-end, I have some finish work to accomplish. As "Artist in Residence" I do want to have my most current work to show and tell about.
So "Rainy Spring" is now done....

To bind it, I folded the back over to the front and stitched it into place, manipulating the fabric in the corners to some semblance of a miter. I left the edge raw, then covered it with some narrow trim (more glitter!) and a row of herringbone...


Now I am working on the Cowgirl CQ....

I would have liked a slightly better color but BiMart is close and this is going to be a working quilt on a ranch....not precious! And I have to say that the top quilted onto microfleece this way yields more of a "bedspread" weight than a quiltlike feel, and it is REALLY nice! I have one on my bed and I love it.
So I'll be quilting all day until my husband calls me out to the garden to help plant the onions...

I definitely plan on blogging from Asilomar, so next time I'll be posting from beautiful Pacific Grove, CA...
Bye for now!
Sunday, May 6, 2012
Katazome: A Morning with Karen Illman Miller
After my talk was finished at the Mary's River Quilt Guild, several audience members introduced themselves (one of my FAVORITE parts about visiting guilds). One of them was Karen Miller, holding a book her work is featured in, which she wanted to show me. Art Quilt Portfolio: The Natural World is a showcase of some of the finest art quilters working today, written by Martha Seilman, Executive Director of SAQA, the Studio Art Quilts Association.

As I paged through Karen's work, I instantly knew that I was in the presence of a master craftsperson and serious fiber artist. Her passion and path is the ancient Japanese technique of stencil cutting, called Katazome.
An excellent quick overview of the process can be found on Karen's website, here. The meticulously cut stencils are laid on fabric, a resist paste is spread over them, the stencil removed and the paste allowed to dry; then the fabric can either be painted or dipped into dye. Karen does both, and the dye she uses is the traditional Japanese indigo.
I was stopped in my tracks by this woman's art in the pages of Martha's book. Karen had a thoughtful demeanor and was very humble as she talked a little bit about it. When I asked if I could come see her the next morning to learn and see more, she graciously agreed.
 The entry to her home evokes a tranquil Japanese tea garden.
 The first thing I saw in her living room was a print made from this stencil. This white oak was cut from handmade Japanese paper called "shibugami". Click on the picture and see the detail that Karen cut, all by hand. Not by laser. By hand.
We went down to her basement, where the workspace is.
 I was entering a very special world, and I knew it.
 Here Karen is showing me some fabric that has had the resist paste, (which is made by combining rice flour, rice bran, and water, then boiled) applied through stencils and is now stretched to dry.
 Here is a close up of the pasted fabric.
Karen's work can be both large scale like this, and also extremely detailed. One of the main forces driving her is pattern, whether in her interpretations of traditional Japanese designs or in her own personal imagery, where she abstracts patterns from nature for use in her stencil designs.
Karen was for many years a marine biologist, which informs her art to great extent, I think.
 This stencil design is inspired by a sea fan.
 I think this one might be bone marrow (I forget.)
She showed me many, many cool ones.
She also showed me an antique Japanese stencil that illustrates how minutely detailed this process can get.
Click on it so you can really see it up close:
 It is thrilling to contemplate the mindset, skill, and tradition that went into producing this stencil.
She had shelves full of her own stencils--she's been doing this for 18 years. The one she had out that caught my eye and captivated me was this one:
 I asked her if she had any of this printed and dyed up...I didn't know until then that she has a large inventory and is in the business of selling her hand printed and dyed indigo fabrics, as well as the exquisite noren, or traditional split door curtains. You can see a gallery of her noren here.
My favorites of her noren are the ones she did using stencils she created of two of the Cascade peaks in our area of the Pacific Northwest, Mt. Rainier and Mt. Hood.
 This is the Mt. Rainier noren in progress....and that oak tree stencil put to fine use.
And look what she did with our beloved Mt. Hood:
 Karen says one thing she loves about this process is the subtle gradation of color she can get, which wouldn't be possible with silk screening. She can work and rework the color.
 The November palette of this noren is an example of the nuanced mood she can cast with her colors.
She also produces silk art garments.
 Can you imagine how it would feel to wear that?
She showed me a quilt she has in progress.
 The biologist is at work here, for sure.
Then....it was time for me to go shopping!!!!
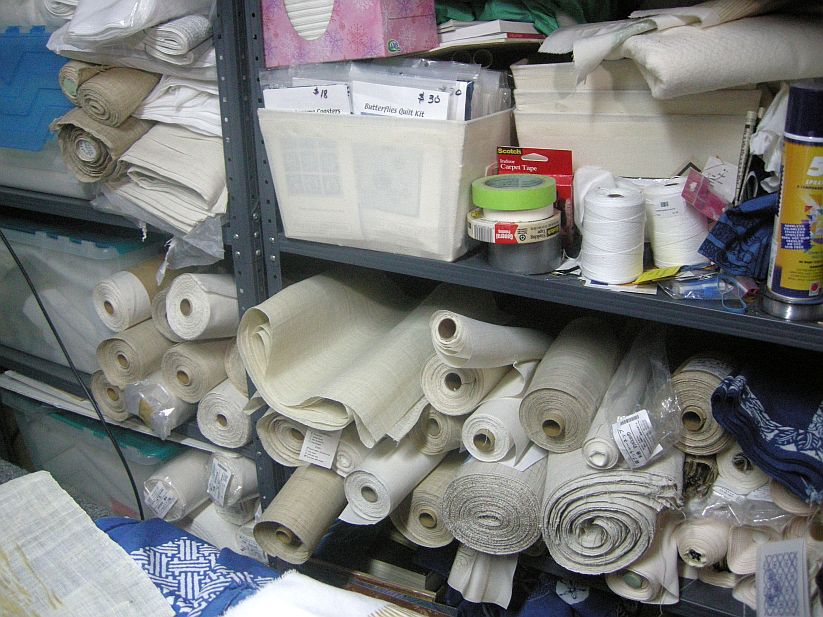
 I was in the market for indigo fabrics. These bolts of Robert Kaufman prepared-for-dyeing cotton are her raw materials for that.
 She imports linen, rayon, and silk from Japan for the noren and other work.
I knew I couldn't appreciate the intricacies of the indigo dyeing process as Karen was explaining it to me...I was just too ignorant.
 These vats of indigo may hold many mysteries to me, but not to Karen.
I loved the clamps she uses to hold up the fabrics to dry after they've been dyed.
 They've been dyed, too, over the years!
She has her inventory organized neatly in bins.
 And there was my favorite stencil design, dyed up and waiting for me!
The bins were all labeled like this:
 I had to look through a lot of them...I just had to. Karen was most obliging.
 We pulled out the fabrics I loved best and thought would be most useful in a future project.
 There was treasure to be had for sure! And not just with Karen's indigo, but with some vintage textiles she had from Japan, too, that used other techniques like shibori and ikat (dyed warp) weaving.
I came away with an amazing stash.
 For all that goes into this incredible fabric, Karen's prices are very reasonable. If you are in the market for Japanese indigo, you will not do better than this, for cost, selection, and quality.
The last fabric I chose was that Mt. Hood panel, my favorite piece of all.
On my way home from Corvallis, where Karen lives, I passed through Portland and went to see my friends at The Button Emporium. I was looking for some trim for another project, but I had to show Marvis Lutz, the owner, this incredible fabric. She was as excited about it as I was, especially by Mt. Hood.
I told her I thought it needed a moon...and she brought out an antique mother-of-pearl disc that is almost 100 years old. We found some cherry blossom appliques that she had had made especially for the store, and some raku salmon buttons....
 Laid out very quickly, I found a glimpse of the direction I'll be heading...the salmon swimming up the Columbia, the cherry blossoms of Hood River, the moon over the mountain...
I am in Karen's debt, and Marvis's too, for providing me with such supreme beauty to work with....

As I paged through Karen's work, I instantly knew that I was in the presence of a master craftsperson and serious fiber artist. Her passion and path is the ancient Japanese technique of stencil cutting, called Katazome.
An excellent quick overview of the process can be found on Karen's website, here. The meticulously cut stencils are laid on fabric, a resist paste is spread over them, the stencil removed and the paste allowed to dry; then the fabric can either be painted or dipped into dye. Karen does both, and the dye she uses is the traditional Japanese indigo.
I was stopped in my tracks by this woman's art in the pages of Martha's book. Karen had a thoughtful demeanor and was very humble as she talked a little bit about it. When I asked if I could come see her the next morning to learn and see more, she graciously agreed.


We went down to her basement, where the workspace is.


Karen's work can be both large scale like this, and also extremely detailed. One of the main forces driving her is pattern, whether in her interpretations of traditional Japanese designs or in her own personal imagery, where she abstracts patterns from nature for use in her stencil designs.
Karen was for many years a marine biologist, which informs her art to great extent, I think.


She showed me many, many cool ones.
She also showed me an antique Japanese stencil that illustrates how minutely detailed this process can get.
Click on it so you can really see it up close:

She had shelves full of her own stencils--she's been doing this for 18 years. The one she had out that caught my eye and captivated me was this one:

My favorites of her noren are the ones she did using stencils she created of two of the Cascade peaks in our area of the Pacific Northwest, Mt. Rainier and Mt. Hood.

And look what she did with our beloved Mt. Hood:


She also produces silk art garments.

She showed me a quilt she has in progress.

Then....it was time for me to go shopping!!!!

I knew I couldn't appreciate the intricacies of the indigo dyeing process as Karen was explaining it to me...I was just too ignorant.

I loved the clamps she uses to hold up the fabrics to dry after they've been dyed.

She has her inventory organized neatly in bins.

The bins were all labeled like this:


I came away with an amazing stash.

The last fabric I chose was that Mt. Hood panel, my favorite piece of all.
On my way home from Corvallis, where Karen lives, I passed through Portland and went to see my friends at The Button Emporium. I was looking for some trim for another project, but I had to show Marvis Lutz, the owner, this incredible fabric. She was as excited about it as I was, especially by Mt. Hood.
I told her I thought it needed a moon...and she brought out an antique mother-of-pearl disc that is almost 100 years old. We found some cherry blossom appliques that she had had made especially for the store, and some raku salmon buttons....

I am in Karen's debt, and Marvis's too, for providing me with such supreme beauty to work with....
Subscribe to:
Posts
(
Atom
)


