Right before I left for California (back safe and sound last night) I pieced up a Christmas fan to work on while I was away.
I got absolutely nothing done on it, not one stitch! But I did have a wonderful Thanksgiving reunion with my DH's family.
After all my experimenting on the Cottage CQ, I've been feeling the need to do some traditional crazy quilting as a little mental relief. I have a collection of vintage CQ digital images to draw from, and I especially liked this fan.
So I think I'll whip this out before going back to the beach scene...it needs a little rest anyways.
When quilts tell you to give them a break, it is worth listening to them.....!
Pages
▼
Sunday, November 30, 2008
Wednesday, November 26, 2008
Cottage CQ...Grasses
This has been fun.
I'm not finished with the grassy section yet but I've made good progress. I feel like I'm getting into the groove of combining landscape embroidery with crazy quilt stitching and it is melding the way I hoped it could.
I'll show details and then the overall view....
As usual, the larger stitches are in the foreground of the "picture plane"....
...and the finer stitching is "farther away", visually. Hopefully this helps to create the illusion of a depth of field.
This section is not quite done yet, but you get the idea.
I think it needs many more bullion seedheads.
I've enjoyed dipping into my stash of nature-colored threads, yarns, and ribbon so much.
There will be lots of tweaking of course but things are really flowing now for the first time since this project began....and it has me looking forward with much more confidence to the waves section.
Now I'm signing off until Sunday...
...and want to wish ALL of you a wonderful Thanksgiving holiday. We are so blessed...!
Sunday, November 23, 2008
Cottage CQ...Woods Finished
Well, all the seams are covered anyway.
Here is the left side....
....and below is the right side.....
The light green "leaves" along the seam-trees with the gray trunks are lazy daisies using Kreinik Soie Noppe thread with little silk floss lazy daisies in the centers of the lighter colored ones. I've been pretty heavy handed with the iron so have smashed these threads pretty flat. At the very last stage I'll put a few more "puffy" ones on top.
All these seam treatments are close in color and value to the background fabrics. I just wanted to increase the complexity of the texture and emphasis some of the lines without making it too busy with a lot of contrast.
Next comes the first of the foreground grasses....
We'll see how it goes!
It is fun to be experimenting, no doubt. But I'm already thinking ahead to my next mini crazy quilt project....it is going to be SO traditional.
My brother Ben always says that "moderation is the oscillation between extremes".....oh that is too true....
(He also describes himself as a "paranoid optimist"....I do so love my brother...)
Friday, November 21, 2008
Cottage CQ...Traditional Seams
Thank you all for your comments about enjoying the progress of this experiment!
It is definitely a departure from normal crazy quilting...
...although I have been putting some simple and traditional stitching on the seams around my "seam driven motif" trees. I just had to see how the two approaches would integrate.
I want to make sure this "reads" as a crazy quilt, not just a landscape quilt. These traditional stitches give that connotation, but they look kind of woodsy, too, mainly because of their similiarity of line, scale, and color to the printed imagery.
Fun, fun! I think it's working o.k.
Here's a view of the woods section so far....
I want to keep the seams fairly simple, mostly because that inkAid treated fabric is so awful to stitch through. Bent needles, pliers, many jabs into my fingers while stitching...I will not be using that stuff in an application like this again. Yowie....
The beach was mostly printed without it, and I look forward to stitching through that nice soft cotton....
Oh, and the bulldozers have been and gone, too...
The transition is better and makes more sense visually.
The shape seems a little lopsided, like the central oval around the cottage has a bump in it. But that's where embellishment can solve my problems. Some nice clumps of beach grass along that bottom edge should even things out nicely....at least, hopefully!
Wednesday, November 19, 2008
Cottage CQ...Seam Driven Motifs
"Seam driven motifs" is a term I made up to describe how I'm experimenting with this stitching on the Cottage CQ. I want the seams to be covered with stitching, as in all crazy quilting, but those stitches are supposed to contribute to the representational imagery of the composition. So I had to come up with a new designation.
It was fun to read Sharon B getting excited about this here.
These trees on the right side of the cottage show what I mean. The stitching of the leaves and pine needles follow the seams between the patches, but they create the objects, the tree motifs, as well.
Here are the trees on the left side...
I did have to go "cross country" across one of the patches on this side, as the seams hadn't been sewn exactly in a tree like configuration.
But we don't want too much pre-planning here, do we?
Here's the overall view. I've printed up some "woods to beach" transition fabrics for that left hand side that's been bothering me. So now I'll get out the bulldozer and see if I can reshape that beach more to my liking...
Sunday, November 16, 2008
Cottage CQ...Embellishment Begun
I've been happily working away all week-end, listening to just the greatest radio event...I have to tell you about it.
KINK is my Portland FM station of choice. It's been on the air for 40 years this Christmas, so to celebrate they are devoting each day between now and then to a year of music, counting down from their beginnings to the present on Christmas day. Today is the third day in the series, 1970, and I have been wallowing, reveling, and grinning in nostalgia, dancing and singing along as I've been sewing.
It's amazing, hearing this great music from the past in large chronological doses. Boy does it take you back. Some of the albums were Layla, Workingman's Dead, Tea for the Tillerman, Moondance, Sweet Baby James....Get the idea? Paul McCartney's and George Harrison's first solo albums came out that year, there were protest songs by CSNY, the Temptations and others...and don't forget "Baby I'm A Want You" by Bread (every schoolgirl's fantasy), "Lola" by the Kinks, "Mr. Customs Man" by Arlo Guthrie ("don't check my bags if you please..."), "Feelin'
Alright" by Joe Cocker (the piano is so DOWN!), "Child's Song" by Tom Rush....the list goes on and on....
KINK is streaming this live on the internet, so you can join in here at KINK.fm. I am looking forward to 1971 tomorrow, and of course, the year I graduated high school, 1972, on Tuesday.
The music sent me delving through the archives and I found my yearbook from East Grand Rapids High School, 1970.
A little heavy on the mascara there, and no, my hairstyle hasn't changed since then!
The only other picture of me in the yearbook was with the dance team...each class had a girls' dance group that did pom pom routines at football games, Christmas Assembly performances, etc. (The dance team was in reality some kind of inhumane and wretched popularity contest. For some of us this was a matter of psychic survival. *sigh* If only we'd known better....)
We were so straight, so conformist! The Revolution came late to Grand Rapids, I can tell you that. Still, those were innocent times and I remember so much of it fondly...
Remember those Peter Pan collars, circle pins, cable sweaters and matching knee socks, ladies?
So if you can do it, check out KINK and take a great cruise down memory lane....
OK, on to the cottage.
I got the quilt squared up and trimmed so I could see it as a whole, and then took a deep breath and dove in with my first embellishment.
I am building some trees along the seams on either side of the cottage. "Seam driven motifs" is what I call them.
I'm eager to get some more traditional CQ like seam treatments on there to see how they combine with the more landscape-like stuff.
The beach area is really bugging me so that may go through some changes...but meanwhile, it's back to 1970 for me!!!
Saturday, November 15, 2008
Our Beloved Sharon B Has Moved!
In A Minute Ago, Sharon Boggon's blog and a central square of the world wide online textile village (its fountain, in fact, in my opinion) has moved.
Find her here at Pin Tangle
Add her to your RSS and leave her a comment (called a "post" in her new blog service...it's a different term but same method is involved...)
Good luck, Sharon, and congratulations on the move. We'll be reading regularaly!
Find her here at Pin Tangle
Add her to your RSS and leave her a comment (called a "post" in her new blog service...it's a different term but same method is involved...)
Good luck, Sharon, and congratulations on the move. We'll be reading regularaly!
Friday, November 14, 2008
Cottage CQ...Piecing/Appliqueing Finished
Esther gave her take on the composition of this piece in her comment in the previous post. I appreciated her candor, thoughtfulness, and also the fact that I agreed with what she said. (I appreciate everyone else's comments too. Thanks so much...)
Composition has been the A Number One Issue of this project, really the toughest challenge I've taken on in my crazy quilting life. And there are some things I am not happy with as things stand now.
But....
The great thing about crazy quilting is that the fabrics as pieced or appliqued to form the quilt top only serve as the background to what happens with the embellishment. Lots, if not most, of compositional decisions can be made "after the fact" of the fabric placement.
So I have hopes that I can mold this more to my liking, strengthen it, and alleviate the trouble spots, the main one of which is the transition between the beach and the midground. And I have some ideas for that, fortunately!
So with everything finally sewn down I was able to pin it up on my design wall and get a good look at it.
The corners are not finished of course, but this is the main body of the quilt.
It is hard to imagine this covered with embroidery. It seems finished as is, in a way.
But it's not. There are going to be some trees added for sure...and grasses...and bubbles....and of course the cottage will be embroidered...and...?
Your guess is as good as mine.....
Wednesday, November 12, 2008
Cottage CQ...Further Progress
I am at the assembly stage of the different sections.
But before I show the overall view as of today, I thought I'd share another little piecing tidbit.
I like to layer fabrics and piece them as one sometimes, when the top fabric is sheer or loosely woven.
You don't have to use the 505 Spray here to temporarily hold the two fabrics together, but I like it because it prevents wrinkles or shifting of one fabric or the other while piecing with them.
So I give a quick spray to the bottom fabric, and then iron the top one over it.
Then I cut it to size....
...then sew it in place, and iron the heck out it (which hasn't been done here yet).
It's a simple way to get some extra texture in there.
As I began to work on the beach section, I realized I didn't quite have the imagery I needed. Part of the fun of this project is printing up the fabric as I need it.
I especially needed more sand. So I made some!
You can see where I am starting to play with it here.
That white squeaky sand on the shores of Lake Michigan just can't be beat.....
Before I could finalize the wavy section, I felt like I had to get the rest of the quilt top assembled, so I could really see what I had to work with. So I began hand appliqueing my "chunks".
You can see this one is ironed, pinned into place, and ready for some stitching.
I have to say, the inkAid coated cotton prints are a beast to stitch through. Too bad, that, but oh well.
So here I am as of this morning....
The midground chunks are pinned in place and ready to applique. The wavy section has been partially sewn but is actually quite unresolved and could change quite a bit....the newly printed beach might even have to go.
This process has been a good test of trying ideas out and then letting go of them again. And again. And again. They break like waves....!
Sunday, November 9, 2008
Cottage CQ...Midground Pieced (Mostly)
It's coming along, but is pretty exhausting work! This is mostly because I am having to invent my sewing strategies as I go along, all the while shaping the composition as best I can in the process.
There seems to be a large oval developing in the center, which I like, but I am not going for symmetry either.
One tool that's helped a lot is my laptop! I would try different fabric arrangements of the grassy midground area, photograph them, then look at the image "reduced" on my laptop.
This helped me see where I wanted to change the value of an area, or how I wanted the waves to flow, or if some color was a little "off". It was a good way to audition fabrics.
This was the final "lay out". I decided I wanted the waves and beach to flow around and down.
Then I spent part of yesterday and today sewing that midsection.
This part was definitely the most difficult area to sew so far. I'm getting the look and feel that I want, though, which is what keeps me going.
That white area above the waves along the bottom is going to be a big foamy wave with lots of heavy white stitching, bead and crystal bubbles, like it is breaking on the shore. It balances out the white in the sky above the cottage, and also will be a great challenge! Because it will have the heaviest embellishment, that should make it "read" smack in the foreground.
I hope to get my beach "chunks" pieced tomorrow. Then will come the very slow and careful process of fitting and sewing them all together by hand.....
Friday, November 7, 2008
Cottage CQ...Woods Pieced
What a piecing adventure this has been! I've got the woods section laid out and sewn (but not to the foundation yet).
There were a few tricks along the way that I'd like to share with you all...
One concerns getting that perfect piece of fabric, the right value and exact color, on the spot as I needed it.
I liked this green tone on tone print here, but it was too blueish. Dye-Na-Flow to the rescue! This took all of 30 seconds.
Another little trick helped me piece fabrics of quite different weights and weaves together without ripples or distortion.
That is some fusible interfacing cut to size and about to be ironed onto some lightweight, wiggly silk. I especially needed the silk to behave because it has a tree trunk printed on it, and that trunk had to stay straight.
There was some contortionist sewing involved, I must say.
Most of the time it went o.k. Here is a series of pictures that shows one tricky place I got out of...it was pretty high stakes, too!
This tree photo had to fit into that irregular shape to the left. In this picture I have traced over the shape with yellow quilting paper (known back in design school days as "trash paper").
I slipped my print behind the traced shape and just cut it out from underneath, adding seam allowances all the way around.
As an aside......I was able to do this because the fabric had been treated with a pre-coat called inkAid before printing, and the inkAid made it fairly stiff. This pretreatment gave me brighter colors and sharper detail in my prints which was great, but I sacrificed the "hand" of the fabric in exchange. When I go to embroider through it I will be punching little holes through the coating. Worth it though, in this case. I didn't use the inkAid for the grass and beach prints, as I want those soft and the detail there isn't as important as in the leaves, pine needles, etc.
OK, back to insetting this shape....
I was slightly nervous about pulling this off, I admit.
When piecing a large complex shape like this, I start in the middle and sew first one side and then flip it around and sew the other, from the center.
Not too bad here! Those two inner corner areas are a little bulky and got slightly munched, but nothing a hot iron and some hand embroidery over them won't solve.
Here's a detail shot from the other side of the quilt. I was as careful as I could be to keep all those tree trunks paralell.
And here is where I am as of now....
I'm using a different print of the cottage, one that isn't shadowed across half of the front. I like that tree in the foreground, too.
Overall, this section is about 26" X 40". Next will be the grassy section, and finally I'll get to do the beach (that's desert).
I will sew the whole thing completely together before I start any of the embroidery.
Actually, the embellishing is the desert part, isn't it?
There were a few tricks along the way that I'd like to share with you all...
One concerns getting that perfect piece of fabric, the right value and exact color, on the spot as I needed it.
I liked this green tone on tone print here, but it was too blueish. Dye-Na-Flow to the rescue! This took all of 30 seconds.
Another little trick helped me piece fabrics of quite different weights and weaves together without ripples or distortion.
That is some fusible interfacing cut to size and about to be ironed onto some lightweight, wiggly silk. I especially needed the silk to behave because it has a tree trunk printed on it, and that trunk had to stay straight.
There was some contortionist sewing involved, I must say.
Most of the time it went o.k. Here is a series of pictures that shows one tricky place I got out of...it was pretty high stakes, too!
This tree photo had to fit into that irregular shape to the left. In this picture I have traced over the shape with yellow quilting paper (known back in design school days as "trash paper").
I slipped my print behind the traced shape and just cut it out from underneath, adding seam allowances all the way around.
As an aside......I was able to do this because the fabric had been treated with a pre-coat called inkAid before printing, and the inkAid made it fairly stiff. This pretreatment gave me brighter colors and sharper detail in my prints which was great, but I sacrificed the "hand" of the fabric in exchange. When I go to embroider through it I will be punching little holes through the coating. Worth it though, in this case. I didn't use the inkAid for the grass and beach prints, as I want those soft and the detail there isn't as important as in the leaves, pine needles, etc.
OK, back to insetting this shape....
I was slightly nervous about pulling this off, I admit.
When piecing a large complex shape like this, I start in the middle and sew first one side and then flip it around and sew the other, from the center.
Not too bad here! Those two inner corner areas are a little bulky and got slightly munched, but nothing a hot iron and some hand embroidery over them won't solve.
Here's a detail shot from the other side of the quilt. I was as careful as I could be to keep all those tree trunks paralell.
And here is where I am as of now....
I'm using a different print of the cottage, one that isn't shadowed across half of the front. I like that tree in the foreground, too.
Overall, this section is about 26" X 40". Next will be the grassy section, and finally I'll get to do the beach (that's desert).
I will sew the whole thing completely together before I start any of the embroidery.
Actually, the embellishing is the desert part, isn't it?
Wednesday, November 5, 2008
Cottage CQ Underway, Take 2
I was fully expecting a false start on a project as large and difficult as this one, and yesterday was it. Worked all day, then ripped everything out before going to bed.
I realized first of all that this quilt has to be constructed as a "whole cloth"...I need to see it all at once as I am working on it.
Which meant I needed a wider table to lay it out on as a whole, as the design wall is too vertical. (!)
Which meant I needed to rearrange my sewing room.
I also realized that I need to piece this in "chunks", without a foundation. The large chunks will then be hand appliqued down onto one large foundation.
I had trouble integrating the sky section with the tress, so decided to change my approach to that, too.
All in all, a profitable day spent, as today things flowed smoothly...
I moved my big architect's table to the center of the room, and the narrower table into the corner. I have made many quilts exactly the size of that oak table top. What a coincidence!
Here is the beginning of a "chunk".
And here it is completed. The big tree next to it will remain intact...some imagery needs to be kept whole for compositional purposes, plus I like the differences in scale this gives me.
My second chunk of the morning. I think leaving visual cues like those vertical white pine tree trunks helps gives a coherent illusion of woodlands. And those white pines are so special to me....
So we can start to see where this is going....!
Tuesday, November 4, 2008
Cottage CQ Underway
This work is the absolutely perfect antidote to Election Day for me....
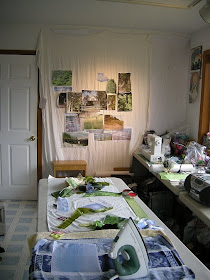
After getting my sewing room squared away for a new project, I've been giving a lot of thought to how this process is going to go. It's different because of the printed imagery, but also because I'll be constructing the quilt in three panels, almost like three "whole quilt" sections, not in blocks.
Immediately I realized there would be some machine piecing, some fusing, and some hand applique...I'll have to bring out the entire toolbox to shape this the way my mind's eye sees it.
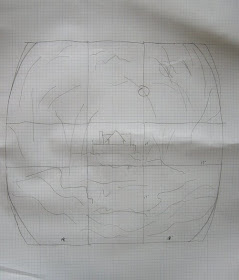
I obviously don't depend too much on detailed drawings.
The design wall was a good way to rough things out, though.
The water is going to flow upward to the left, forming an arc with the sky...
There are so many viewpoints and different kinds of lighting in the photos that getting them to read as a single picture will be challenging...
I've got my palette of crazy quilt landscape fabrics where I can see them and get to them...
...and my work area is set up....
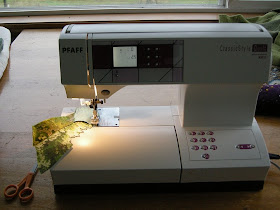
I am inaugurating my shiny new Pfaff from the "My Quilts/Our History" contest, too!
So off I go....
I always start my landscapes with the object farthest away and build outward from there, toward the viewer. In this case that object is the summer sun.....
...And no matter what happens today, God Bless America!
Sunday, November 2, 2008
Printing Fabrics for the Cottage CQ
Fabric printing is always a bit nerve-wracking for me because I am never sure if the colors will be right, the fabric will feed into the printers properly (I use two different printers and many different fabrics), if the print will actually be a good one, etc.
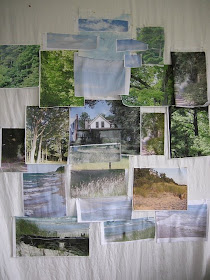
However, once I got into the groove I spent about five hours today printing up images of Michillinda for my landscape CQ....which I will call the "Cottage CQ" from here on. For the most part things went well and I got lots of imagery on fabric to work with.
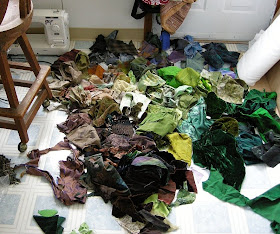
These images will be cut up and pieced in a crazy quilt style along with some standard CQ type fabrics...you can see some of those piled up under the pictures.
The cottage in the center will be embroidered over...that's a technique I really enjoy, and will work well here.
It's going to be quite the challenge to integrate the representational with the abstract...and have the whole read as a cohesive and harmonious composition. But I've been thinking about this quilt--and taking hundreds of photos for it--for about three years, so I am ready to take it on at last!
*********EDIT*********
Diane asked how I get the images on fabric.
Here is a tutorial on the subject from awhile back...